

Field Notes From the Edge
Track five core habits. Reflect each morning and night. Build direction through repetition… not motivation.
A FREE 90-day structure for those who want to show up, not just think about it.
A Quick Note on Links
As an Amazon Associate I earn from qualifying purchases.
This helps me create more class content for you to get inspired by.
Please Note
Outdoor activities involve risk. The information on this site is for general guidance only and should not replace proper training, manufacturer instructions, local laws, or your own judgement. Always use equipment safely and responsibly.
Your phone is useful.
It is also a small glass rectangle with a battery, a signal problem, a screen that hates rain, and a talent for dying at exactly the wrong moment.
Map and compass skills are not old-fashioned. They are outdoor common sense.
You do not need to become a navigation wizard before your next walk. You just need enough skill to know where you are, where you’re going, what the ground is doing, and when your phone map might be leading you into a very wet argument with a hillside.
For UK walkers, these basics matter. Whether you’re heading into the Peak District, walking a coastal path, planning a train-accessible day out or building up to a wild camp, navigation gives you confidence. Not fake confidence. The useful kind.
Why Learn Map and Compass Skills?
Because batteries die.
Because signal drops.
Because fog rolls in.
Because paths disappear.
Because the obvious route on your phone is not always the safest route on the ground.
Mountain Rescue England and Wales advises walkers not to rely solely on a mobile phone or GPS, because many mountain areas have no signal, and your device needs to be correctly set up with map and grid data.
That does not mean your phone is useless. Far from it. A good mapping app is brilliant. But a paper map and compass give you a backup and help you understand the landscape properly.
The aim is not to ditch technology. The aim is to stop being helpless when technology gets awkward.
What You Need to Get Started
You do not need loads of expensive kit.
Start with:
- an Ordnance Survey map for your area
- a baseplate compass
- map case or waterproof pouch
- pencil
- phone with offline maps
- power bank
- head torch if there’s any chance you’ll be out late
Silva compass navigation - EXPEDITION 4

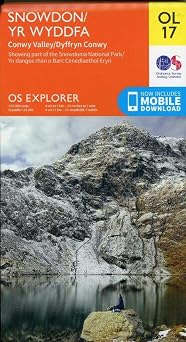
Snowdon / Yr Wyddfa Map
Orientation Compass, Waterproof Map Case with Emergency Whistle

A basic compass and OS map are enough to start learning properly. Do not buy a complicated compass with loads of features you do not understand. Simple and reliable beats clever and confusing.
OS Explorer vs OS Landranger Maps
In the UK, most walkers use Ordnance Survey maps.
There are two common types:
- OS Explorer maps: 1:25,000 scale
- OS Landranger maps: 1:50,000 scale
OS Explorer Maps
These show more detail. Field boundaries, footpaths, bridleways, contours, access land and smaller landscape features are easier to see.
For walkers, hikers and wild campers, Explorer maps are usually the better choice.
OS Landranger Maps
These cover a larger area on one sheet but with less detail. They are useful for road trips, cycle routes, wider planning and bigger-area context.
For beginner walkers, start with an OS Explorer map.
It gives you more detail, which makes learning easier.
Understanding Map Scale
Map scale tells you how much real-world distance is shown on the map.
On a 1:25,000 OS Explorer map, 4cm on the map represents 1km on the ground.
On a 1:50,000 OS Landranger map, 2cm on the map represents 1km on the ground.
That sounds dull until you use it to work out how far you still have to walk before the next pub, station, summit or dry pair of socks.
A map is not just a picture. It is a measuring tool.
Grid References: How to Say Where You Are
Grid references help you describe a location on an OS map.
A four-figure grid reference gives a general square. A six-figure grid reference gives a more accurate location inside that square.
Ordnance Survey explains that a four-figure grid reference is used to identify a square on a map, and that grid references work by reading the numbers across first, then up.
The classic phrase is:
Along the corridor, then up the stairs.
That means read the eastings first, then the northings.
Simple Example
If your grid square is 1234:
- 12 is the easting
- 34 is the northing
For a more accurate six-figure reference, you add a third digit to each part.
You do not need to become perfect at this immediately. But being able to give a rough grid reference is useful, especially if you need help or want to check your location properly.
What a Compass Actually Does
A compass tells you direction.
That is it.
It does not know where you are. It does not care where the path is. It will not save you from poor decisions. It simply points towards magnetic north and lets you line direction up with your map.
A good walking compass usually has:
- baseplate
- rotating bezel
- orienting lines
- map scales
- direction of travel arrow
- compass needle
- ruler
The important thing is learning to use it with the map.
A compass on its own is useful. A compass with a map is much more useful.
What Is a Bearing?
A bearing is a direction measured in degrees.
Ordnance Survey explains that a bearing is the direction you need to travel, measured in degrees from north. A compass is marked from 0 to 360 degrees, with north at 0 or 360, east at 90, south at 180 and west at 270.
You do not need to memorise every number. You just need to understand that a bearing gives you a precise direction to follow.
This is especially useful when visibility is poor, the path is unclear or you need to cross open ground.
How to Orientate a Map
Orientating the map means lining it up with the ground around you.
In plain English: make the map face the same way as the landscape.
A quick method:
- place the map flat
- put the compass on the map
- line the compass edge with a north-south grid line
- rotate the map and compass together until the needle points north
- check nearby features match what you can see
Once the map is orientated, the landscape makes much more sense.
Hills, paths, rivers, walls and woods should start lining up with reality.
If they do not, pause before walking confidently in the wrong direction.
How to Take a Bearing from a Map
This is the classic map-and-compass move.
Use it when you know where you are and where you want to go.
Step 1: Place the compass edge from your current location to your destination.
Step 2: Keep the compass still and rotate the bezel until the orienting lines match the map’s north-south grid lines.
Step 3: Lift the compass off the map.
Step 4: Hold it flat in front of you.
Step 5: Turn your body until the compass needle sits inside the orienting arrow.
Step 6: Follow the direction of travel arrow.
That gives you a line to walk.
Not a guarantee. A line.
You still need to watch the ground, check features and make sure the route is sensible.
How to Follow a Bearing Without Wandering Off
Following a bearing is not about staring at the compass while walking like a haunted robot.
The better method is:
- take the bearing
- pick a visible target on that line
- check the compass again
- look ahead
- walk to it
- pick the next target
Targets can be a rock, tree, fence post, bend in a wall, clump of grass, gate or shape on the skyline.
In poor visibility, your targets may be much closer. That is fine. Slow and accurate beats bold and lost.
Handrails, Catching Features and Attack Points
These three ideas make navigation much easier.
Handrails
A handrail is a feature you can follow.
Examples:
- path
- fence
- forest edge
- track
- wall
- river
- coastline
If your route follows a handrail, navigation is simpler because you have something obvious to guide you.
Catching Features
A catching feature tells you you have gone far enough, or too far.
Examples:
- road
- wall junction
- woodland edge
- obvious valley
- stream
- large track
- lake
A catching feature is useful because it stops you drifting endlessly in the wrong direction.
Attack Points
An attack point is an obvious feature near your target.
Instead of trying to find a tiny point in the middle of nowhere, navigate to a bigger nearby feature first, then make a shorter final move.
Example: walk to a footbridge, then take a bearing to the small path junction.
That is smarter than wandering across open ground hoping the junction appears out of politeness.
Reading Contours: The Shape of the Land
Contours are the brown lines on an OS map.
They show height and shape.
Close contour lines mean steep ground. Wider contour lines mean gentler slopes. Rings can show hills, summits or depressions depending on the surrounding land.
Contours help you understand:
- how steep a route is
- whether a climb is gradual or brutal
- where ridges and valleys are
- where water may collect
- where the ground may be exposed
- why a short-looking route might feel horrible
This is one of the biggest beginner upgrades.
Once you start reading contours, maps stop being flat drawings and start becoming the shape of the world.
Spotting Paths, Rights of Way and Access Land
On OS maps, paths and rights of way are marked differently depending on the type of route.
You’ll see things like:
- footpaths
- bridleways
- restricted byways
- byways open to all traffic
- access land
- permissive paths
Do not assume every line on a map is a public right of way. Some tracks are private. Some paths are permissive. Some access rules vary by area.
For most walkers, the key is simple: follow public rights of way, respect signs, and check access information before heading off-path.
Timing Your Route
Navigation is not only direction. It is time.
You should have a rough idea of how long your route will take.
Things that slow you down:
- steep climbs
- bog
- heavy packs
- photo stops
- bad weather
- rough ground
- poor visibility
- gates and stiles
- tired legs
- navigation mistakes
A flat 5 miles on easy paths is not the same as 5 miles of moorland, bog, climb and sideways rain.
When planning, be realistic. Then add a buffer.
A route that ends at sunset with no margin is not adventurous. It is poor admin wearing a fleece.
Using Your Phone Without Depending on It
A phone is still useful.
Use it well.
Before leaving:
- download offline maps
- charge your phone
- carry a power bank
- check location permissions
- use battery saver
- keep it dry
- keep it warm in cold weather
- know how to get your grid reference
Ordnance Survey says OS Locate is useful because it converts GPS location readings from your phone into OS national grid references, and it works without mobile signal.
That is genuinely useful. But it does not replace knowing how to use the map.
Think of your phone as a tool, not the entire plan.
Anker Laptop Power Bank, 25,000mAh

YOSH Waterproof Phone Pouch 2 Pack

PETZL Actik Core, Rechargeable Front Lamp

What to Do If You Think You’re Lost
First: stop.
Do not keep walking just because standing still feels awkward.
Use this simple process:
- stop
- breathe
- check the map
- check the compass
- look for obvious features
- identify your last known point
- check your phone GPS if available
- compare the ground to the map
- avoid going downhill blindly
- turn back if the safest route is behind you
Panic makes people move. Moving without thinking makes the problem bigger.
If you cannot confidently relocate yourself, stay safe, stay visible, stay warm and call for help if needed.
In the UK, for mountain rescue, call 999, ask for Police, then Mountain Rescue.
Beginner Practice Drills
You do not need to learn navigation in a storm on a ridge.
Practise somewhere easy first.
Drill 1: Orientate the Map
On a local walk, stop every few minutes and orientate the map to the ground.
Drill 2: Match Features
Look around and identify paths, walls, woods, streams and hills on the map.
Drill 3: Estimate Distance
Pick a point on the map, estimate how long it will take to walk there, then check reality.
Drill 4: Take a Simple Bearing
Take a bearing across a field or park, then follow it to a visible target.
Drill 5: Find Yourself
Stop at random and work out exactly where you are using nearby features.
Drill 6: Use a Grid Reference
Find a location on the map, then write its six-figure grid reference.
Do these on easy ground first. Build the skill before you need it.
Common Navigation Mistakes Beginners Make
Only Following the Blue Dot
The blue dot is helpful, but it does not teach you what the ground is doing.
Not Downloading Offline Maps
Signal is not guaranteed. Download maps before you leave.
Ignoring Contours
A short route with steep contours can be much harder than a longer flatter one.
Not Checking the Compass
A quick compass check can stop you following the wrong path for half an hour.
Trusting Unofficial Paths
Not every visible path goes where you think. Sheep, bikes and people all create lines that may not be rights of way.
Forgetting Darkness
Navigation gets harder when the light drops. Carry a head torch.
Not Turning Back
Turning back early is better than committing late.
Leaving the Map in the Bag
A map you never look at is just decorative paper.
Simple Navigation Kit for UK Walkers
A practical beginner setup:
- OS Explorer map for the area
- waterproof map case
- power bank
- pencil
- whistle
- baseplate compass
- phone with offline maps
- head torch
- small notebook
- first-aid kit
Silva compass navigation - EXPEDITION 4
Snowdon / Yr Wyddfa Map
Orientation Compass, Waterproof Map Case with Emergency Whistle
Rite in the Rain Waterproof Paper Pocket Wire Bound Spiral Notebook

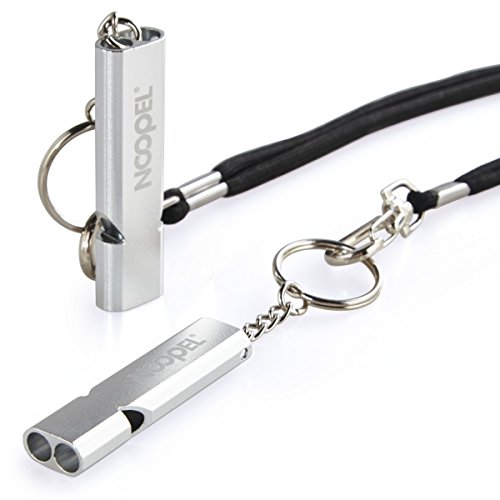
Emergency Survival Whistle Noopel Double Tubes
Keep it simple. Learn the basics. Use the kit regularly.
Navigation is not something you buy once and magically absorb through your rucksack.
When Map and Compass Skills Matter Most
You should be especially switched on when:
- visibility is poor
- walking on open moorland
- crossing pathless ground
- hiking in the hills
- walking near cliffs
- following routes with many junctions
- returning in the dark
- camping away from obvious paths
- relying on public transport timings
- weather is changing
You may not need advanced navigation on a sunny canal walk. But the more remote, exposed or changeable the route becomes, the more these skills matter.
Final Thoughts: Learn Enough to Stay Found
Map and compass skills are not about being hardcore.
They are about being less useless when the easy option fails.
Start small. Learn to read an OS map. Understand contours. Practise grid references. Take simple bearings. Check your phone, but do not worship it. Build the habit of knowing where you are, not just hoping the app does.
The more you practise, the calmer you get.
And calm is useful outdoors.
Especially when the path disappears, the cloud drops, and your phone starts pretending 6% battery is acceptable.
Map and Compass FAQs
Do I still need a map and compass if I use a phone app?
Yes. A phone app is useful, but batteries die, screens break, weather gets awkward and signal can disappear. A paper map and compass are still worth carrying and knowing how to use.
What type of map is best for UK walkers?
An OS Explorer map at 1:25,000 scale is usually best for walking because it shows more detail, including footpaths, bridleways, contours, access land and smaller landscape features.
What compass should beginners buy?
A simple baseplate compass is best for beginners. Look for a clear baseplate, rotating bezel, direction of travel arrow and map scales. You do not need anything overly complicated to start.
What is a grid reference?
A grid reference is a way of describing a location on an OS map. A four-figure grid reference gives a general square, while a six-figure grid reference gives a more accurate location inside that square.
What is a bearing in navigation?
A bearing is a direction measured in degrees from north. You can take a bearing from a map, then use your compass to follow that direction on the ground.
How do I practise navigation as a beginner?
Start on easy local walks. Orientate the map, match real features to map features, practise grid references and take short bearings between visible points before trying more serious routes.


